A turbo rebuild kit typically bundles a new center cartridge (CHRA), thrust bearings, journal bearings, seals, and gaskets for a fraction of the cost of a brand-new unit — component-level kits from suppliers like Stainless Diesel and Treadstone run roughly $19.99 for individual seal/gasket sets up to $278.99 for a full CHRA replacement, depending on turbo model and kit scope (Stainless Diesel, retrieved 2026-08-08). Knowing exactly which components a kit includes — and which ones your specific failure actually requires — is what separates a successful rebuild from a repeat teardown.
This guide covers what’s actually inside a turbo rebuild kit, how to diagnose whether your turbo needs a full CHRA replacement or just bearings and seals, what tools the job requires beyond the kit itself, and when a full rebuild stops making financial sense versus a reman or new unit.
Key Takeaways
- Turbo rebuild kits range from basic seal/gasket sets around $19.99–$40 up to full CHRA (center cartridge) kits around $278.99, depending on scope and turbo model.
- A CHRA replacement is warranted when the shaft has play, the bearings are scored, or the turbine/compressor wheel shows contact damage — seals and gaskets alone won’t fix those.
- Oil starvation and contamination are the two leading causes of turbo bearing failure, so diagnosing the root cause matters as much as the rebuild itself.
- Melett is a widely recognized supplier of OEM-spec CHRAs and rebuild components used by professional turbo shops.
- A rebuild only makes sense if the turbine housing and compressor housing are undamaged; cracked or heat-warped housings usually mean replacing the whole unit is more cost-effective.
What’s Actually Inside a Rebuild Kit
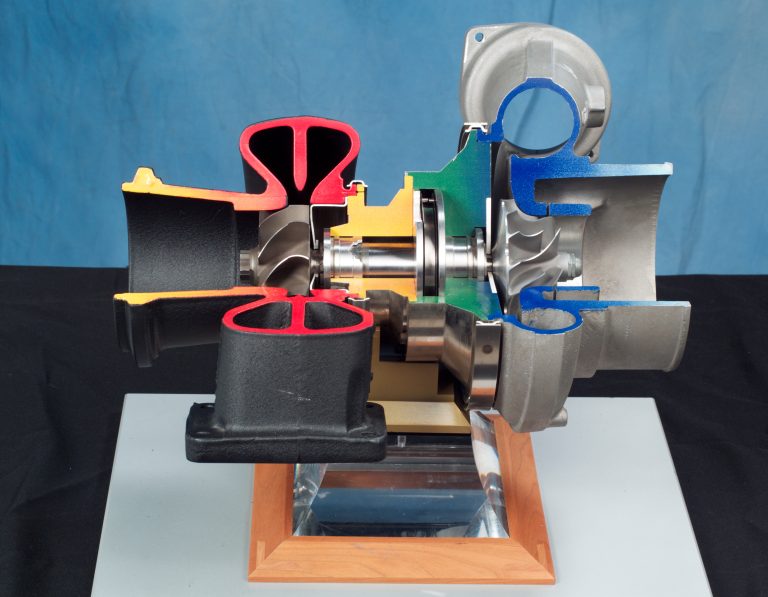
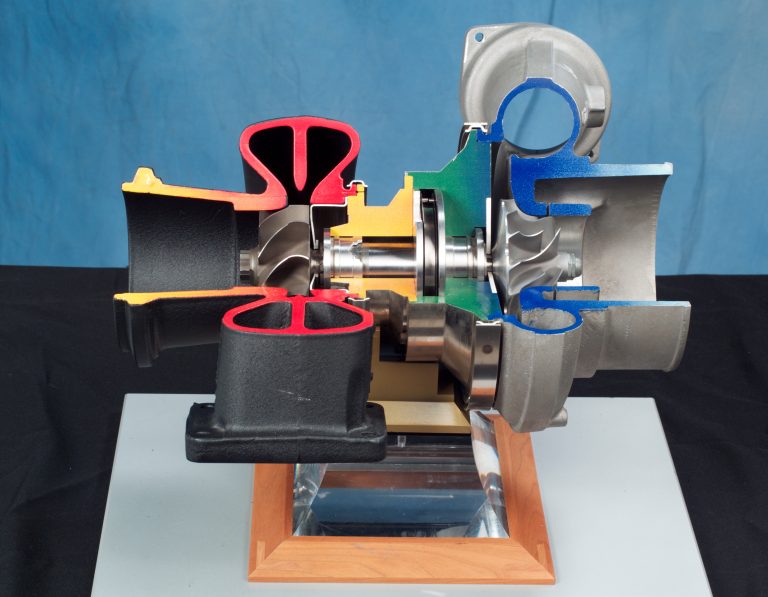
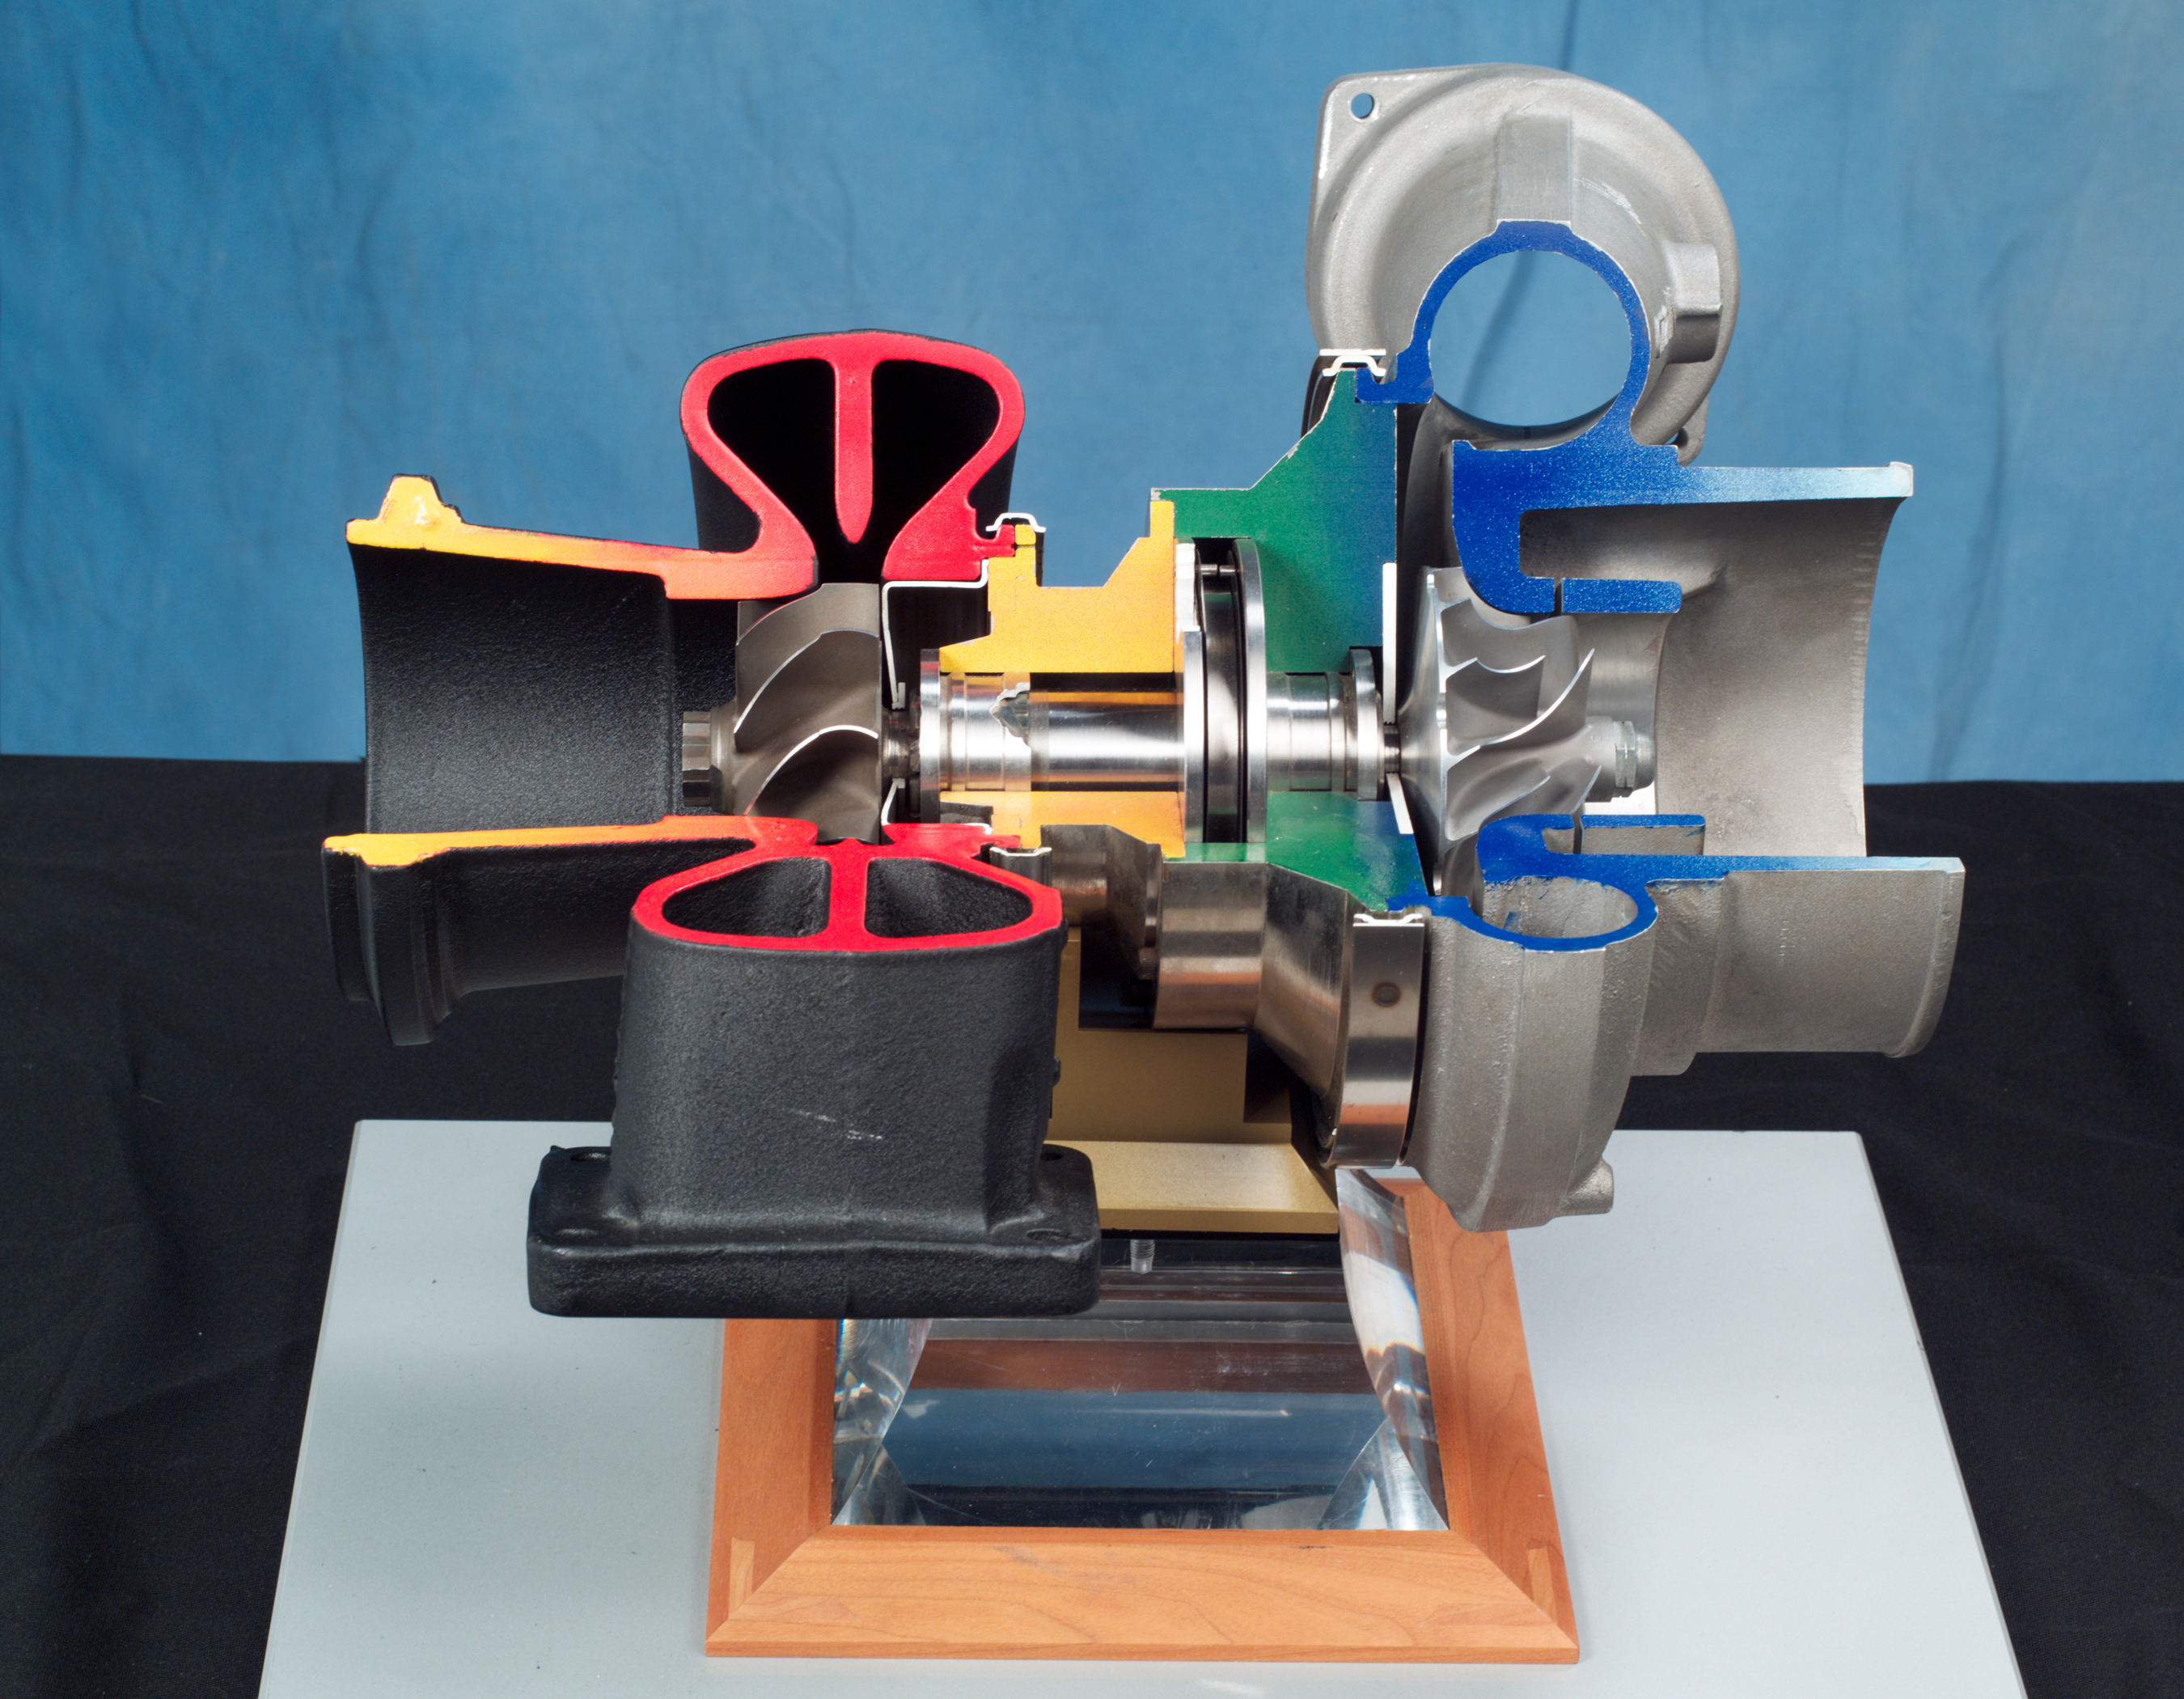
A basic turbo rebuild kit covers the wear parts that fail first under normal use: the oil seal rings, thrust bearing, journal bearings, and the gasket set needed to reseal the housings after reassembly. A full CHRA (center housing/rotating assembly) kit goes further, replacing the entire shaft-and-wheel assembly along with the bearings and seals as a matched unit — this is the more expensive option but eliminates the risk of pairing worn shaft tolerances with new bearings (Stainless Diesel, retrieved 2026-08-08). Treadstone and Melett both offer CHRA options built to OEM tolerance specs, which matters because an out-of-spec shaft will re-wear new bearings quickly regardless of kit quality.
Diagnosing What Your Turbo Actually Needs
Before buying a kit, check for shaft play by hand — excessive radial or axial movement at the compressor wheel indicates worn bearings or a damaged shaft, not just a seal problem. Listen for a high-pitched whine that changes with boost, which often signals bearing wear, and inspect the compressor and turbine wheels for contact marks against the housing, which indicate the shaft has already moved enough to strike metal. If wheels show contact damage or the shaft has measurable play, a seals-only kit won’t fix the underlying issue and you need a full CHRA replacement instead.
Root Cause: Oil Starvation and Contamination
Rebuilding the turbo without fixing the underlying oil supply problem is the most common reason a fresh rebuild fails again within months. Oil starvation — from a clogged feed line, failing oil pump, or wrong oil grade — and contamination from dirty oil or a failed air filter are the two leading root causes of turbo bearing failure. Before reassembly, flush and inspect the oil feed and drain lines, replace the oil and filter, and confirm the air filter and intake tract are clean; skipping this step risks damaging the new bearings the same way the old ones failed.
Tools and Skills the Job Requires
Beyond the kit itself, a turbo rebuild needs a clean workbench, snap-ring pliers, a torque wrench for reassembly to spec, and ideally a way to balance the rotating assembly after reassembly — an unbalanced shaft will wear new bearings prematurely even with correct parts. This is part of why many DIYers send the core out to a specialist shop for the actual CHRA balancing step while handling housing cleaning and gasket work themselves.
Step-by-Step: What the Rebuild Process Actually Involves
Begin by removing the turbo from the vehicle and thoroughly degreasing the exterior before disassembly, since oil and grime on the housings makes inspection harder and can contaminate the clean work area during reassembly. Mark the orientation of the compressor and turbine housings relative to the center section before separating them, since most housings can be clocked to different positions and you’ll want to restore the original orientation unless you’re deliberately repositioning for a specific installation. Once separated, inspect the housings for cracks, heat discoloration, and warping before deciding whether to proceed with the rebuild kit or source a full replacement.
With the CHRA or bearing kit installed to the manufacturer’s torque and clearance specifications, reassemble the housings in their marked orientation and torque the clamps or bolts evenly in a cross pattern to avoid warping the seal surfaces. Before reinstalling on the vehicle, pre-lubricate the new bearings by pouring clean oil directly into the oil feed port and rotating the shaft by hand until it spins freely with no binding or grinding — this reduces the risk of a dry startup damaging fresh bearings in the first seconds of running.
Balancing: Why It’s Not Optional
A turbo’s shaft assembly spins at speeds well beyond 100,000 RPM under boost, and even minor imbalance at that speed creates vibration that accelerates bearing wear dramatically compared to a properly balanced assembly. This is why most experienced rebuilders send the reassembled CHRA to a shop with dynamic balancing equipment rather than skipping this step, even when every individual component was purchased new and in-spec — the balancing process accounts for the specific combination of parts in your particular assembly, not just each part’s individual tolerance. Skipping balancing is one of the most common reasons a freshly rebuilt turbo develops a new whine or fails again within a short period despite using quality parts.
When Rebuilding Stops Making Sense
A rebuild only pays off if the turbine housing and compressor housing are structurally sound — cracked housings, heat-warped turbine housings, or a compressor housing with impact damage usually cost more to source separately than the price difference to a reman or new complete turbo. Before committing to a rebuild kit, inspect both housings closely; if either shows cracks or significant warping, price out a reman unit before buying rebuild parts. If you’re evaluating the intercooler side of a turbo upgrade at the same time, our turbo intercooler guide covers FMIC, AWIC, and top-mount options that often get addressed in the same build.
Sourcing Quality Parts: What to Look For
Not all rebuild kits marketed for the same turbo model are built to the same tolerances, and this is one area where the cheapest available kit online often turns out to be a false economy. Melett’s reputation as an OEM-spec supplier comes specifically from manufacturing CHRAs and bearing components to the same dimensional tolerances as the original turbo manufacturer, which matters because a shaft or bearing even slightly out of spec will wear unevenly regardless of installation quality. Check whether a kit specifies the actual tolerance standard it’s built to, or whether it’s simply advertised as a “fit” for your turbo model without further detail — the latter is a red flag worth investigating further before purchase, particularly for turbos running significant boost where tolerance stack-up matters more.
Compressor and turbine wheel material matters too: aluminum compressor wheels are standard and generally reliable when sourced from a reputable supplier, but turbine wheels vary in alloy composition depending on the turbo’s designed exhaust gas temperature range, and an incorrect alloy substitution can fail prematurely under sustained high-EGT conditions. When in doubt about a specific component’s specification, cross-reference the original OEM part number rather than relying solely on the aftermarket kit’s generic model-fitment claim.
Frequently Asked Questions
Do I need a full CHRA or just seals and bearings?
Check for shaft play and wheel contact damage first. If either is present, a seals-only kit won’t fix it — you need a full CHRA replacement matched to OEM tolerances.
Why did my turbo fail again after a rebuild?
Oil starvation or contamination are the leading causes of repeat failure. Flush the oil lines, replace the oil and filter, and confirm the air filter is clean before reassembling a rebuilt turbo.
Is it worth rebuilding a turbo with a cracked housing?
Usually not. Cracked or heat-warped housings typically cost more to source individually than the price gap to a reman or new complete unit.
How long does a turbo rebuild typically take?
For an experienced DIYer with the right tools and a properly sourced kit, a full CHRA rebuild including cleaning, inspection, and reassembly can take a full day to a weekend. Sending the CHRA out for professional balancing adds turnaround time beyond the hands-on portion of the job.
Can I rebuild a turbo without removing it from the vehicle?
No. A proper rebuild requires full disassembly of the center section, which isn’t practical or safe to attempt with the turbo still mounted. Remove and bench the unit before starting any rebuild work.
Gasket Selection and Sealing Surfaces
The gasket set included in most rebuild kits covers the turbine housing-to-center-section joint, the compressor housing joint, and the oil feed and drain connections, and getting these seals right matters as much as the internal bearing work for a rebuild that actually holds up. Before installing new gaskets, inspect the sealing surfaces on both housings for warping, pitting, or leftover gasket material from the old seal, since any of these can prevent a new gasket from sealing properly even when the gasket itself is correct for the application. Light surface warping can sometimes be corrected with careful hand-lapping on a flat surface, but any significant warping or pitting usually means the housing itself needs replacement rather than just a fresh gasket. Use the torque sequence and specification provided with your specific kit rather than a generic “tighten evenly” approach, since uneven torque is a common cause of a gasket leak appearing shortly after reassembly.
Break-In Procedure After Reinstallation
Once the rebuilt turbo is back on the vehicle, a proper break-in period matters more than most DIYers expect, since fresh bearings and a newly reassembled unit benefit from a gradual introduction to full boost rather than immediately being pushed hard. Start the engine and let it idle for several minutes before driving, giving oil time to fully circulate through the new bearings before they’re placed under any real load. For the first several hundred miles, avoid sustained high-boost driving and allow boost to build gradually rather than flooring the throttle from a stop repeatedly, which gives the rotating assembly time to properly seat before facing peak stress. Check for oil leaks at the housing joints and listen for any new noises during this break-in window, since problems introduced during the rebuild tend to surface within the first few hundred miles of driving rather than staying hidden indefinitely.
Documenting the Rebuild for Future Reference
Keep a written or photographed record of your rebuild — part numbers used, torque specs applied, and the date and mileage at time of rebuild — since this documentation becomes valuable if the turbo develops an issue later and you need to diagnose whether it’s a new failure or a symptom traceable to a specific component from the rebuild. This is especially useful if you ever sell the vehicle, since a documented rebuild history reassures a buyer in a way an undocumented “recently rebuilt” claim doesn’t.
The Bottom Line
Diagnose shaft play and wheel contact damage before choosing between a basic seal kit and a full CHRA replacement — guessing wrong means a second teardown. Fix the oil supply issue that caused the original failure before reassembly, and inspect both housings for cracks or warping before committing to a rebuild over a reman unit.